

I did it! I finally (finally) FINALLY finished my project life album for 2015 (let’s just ignore the fact that it is nearly Easter).
I’m so excited to have it completed. Finishing projects like this is kind of a big deal. As an artist I’m easily distracted, I love starting lots of things but when they tend to get tedious I always decide to come back to them later (and coincidentally), later never comes.
This project was started in June-ish? So I was already MONTHS behind. I had been meaning to start an album at the beginning of the year but it just never happened. Till I saw this gorgeous white and gold album.

I promised myself IF I bought that album I’d better make sure to complete it, since all the Project Life cards I bought were collecting dust.
LAYOUT
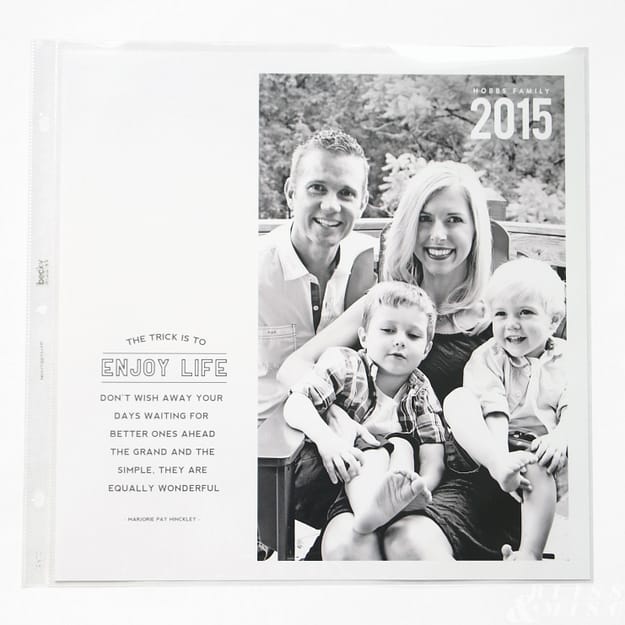
I’ve said before I’m not a scrapbooker. I don’t even think I’m all that “crafty”. I kept my journaling and cards pretty minimal. The last thing I wanted was a bunch of “stuff” cluttering up my layouts.

While I like the Project Life concept I can’t really get behind sticking in random patterned cards (possibly because I take too many pictures and I want to use every space possible for them). So I kept my cards black and white and used icons from flaticon (which are free for personal use) above my journaling.

Occasionally I’d create some calligraphy or pull in a free printable I’d found on Pinterest, but for me simplicity the goal.
DIGITAL ARCHIVE
Since I’m a graphic designer I decided to layout all my pages in InDesign, but you could do the same thing in the Project Life App. Laying them out ahead of time helped me to see what the spreads would look like (two facing pages). It also helped to know which page came I would be using the back of since I wanted to combine several different layouts. Bonus: Now I also have a digital copy of my entire album.

I’d been keeping all my photos and videos backed up to disks (along with my external drive) as well but I created a space to add them into the book by using pages with 6×6 openings.

PLAYING CATCH UP
I already kept my photos arranged in monthly folders since I had been creating a digital archive but I relied heavily on my Instagram, Facebook and twitter to remind myself when things happened. I also used the free pdfs from MySocialBook.com (which basically pulls your entire facebook for a selected amount of time).

My mother always kept a calendar with funny things we had said when we were little so each month started with some 4×4 prints of highlights and images that didn’t make it into my layouts.

On the back of these pages I added quotes from the boys. I know they’ll enjoy looking back on these when they get older.

PRINTING
I could have printed the full 12×12 pages but I didn’t for a few reasons. First, it’s cheaper to print 6 4x6s, second, I’m prone to typos and I can just swap out a card if I notice a mistake and third, I wanted to be able to rearrange things if necessary.

When I decided to start this project I sent the same set of prints to 5-6 photo places to see which prints turned out best. I used Bay, Walgreens, Walmart, Shutterfly and Persnickety Prints.
Persnickety won due to their image alignment (which was important since some of my journaling was ON my prints) and ability to print bordered prints. Also I was able to buy several “packages” of 200 prints for .15 cents each. The prints are always packaged EXTREMELY well and I will typically also order enlargements for framing when I’m placing an order. Shipping is around $5. Recently my prints shipped and arrived within 2 days of ordering (not all my orders have arrived that quickly but it’s super impressive)!

I always get a matte finish on my prints since I think the colors look richer and they have a better feel to them. I will also use Walgreens in a pinch but only via mail order since the results in store can vary but the paper is not as thick as the prints from Persnickety.
WHAT I LEARNED
Go monthly. I did my album by week but I realized it would be better for me to do it by month because some weeks we did nothing and I felt sort of stuck to fill the page and other weeks were jam packed and I felt like I had to edit too much.

Keep track. Also I downloaded the Journey app. It’s great for adding things that I wouldn’t necessarily share on social media but want to remember. It has both text and photo options and the ability to export or print entries for a selected amount of time.

Don’t procrastinate! This year, I don’t want to get more than a month or so behind. I think it makes the most sense to wait till the end of the month each month so I don’t have to print 6 photos at a time (because with two small boys I don’t run any extra errands). Also I think having a little time makes everything less precious, meaning not EVERY picture is a keeper and time gives me a little more perspective.

It’s so worth it. It was a TON of work and a bit of time commitment but I love how it turned out. The boys have already enjoyed looking thru it and saying, “Do you remember when we…” It makes me want to go back and do the previous year because if I caught up after 6 months why not a whole year? 🙂 And SPEAKING of catching up…I need to get back to posting because I have lots of project to share!


3 Comments
Toni
November 25, 2016 at 1:24 pmThank you! I needed to read this. It is exactly what I needed to help me get started as I am the same as you, “I am not a scrapbooker”. Rather than stickers and ephemera… fonts & icons are my thing. And this has encouraged me to get started on my own album. Thank you.
Toni
November 25, 2016 at 1:28 pmCan you tell me the font you used for the boys quotes page please?
Christiana
December 3, 2016 at 10:43 amIt was just Adobe Caslon in italics. The dates are Brandon Grotesque. Thanks!