
You guys…this is totally a big deal: I actually FINISHED a craft project and in a timely manner none-the-less. That NEVER happens.

I don’t really consider myself very “crafty”…creative and artistic…yes, but crafty seems to elude me. Which is super frustrating because I have an art DEGREE I should be able to make whatever adorable thing I saw on Pinterest, right?! What usually I come up with a “GREAT” idea, buy all the stuff I’ll need for it, get distracted when it doesn’t seem to go as planned and never finish it, so in great celebration of my huge and earth-shattering accomplishment (I’m assuming someone else is curing cancer) I’m sharing how it all came to be.
I stopped into our local Ben Franklin’s in search of paint for the mural at my husband’s new school. I’ve decided I need to wear blinders in the craft store since I get distracted and always forget what I’ve actually gone in to buy. I noticed this wreath and even though I loved it, I wasn’t really sure it was worth the $60 price tag.

(Sorry it’s blurry…I was wrangling a baby and making sure my preschooler didn’t touch anything breakable)
Determined to make my own even-MORE-awesome, cheaper version I followed the steps as outlined below:
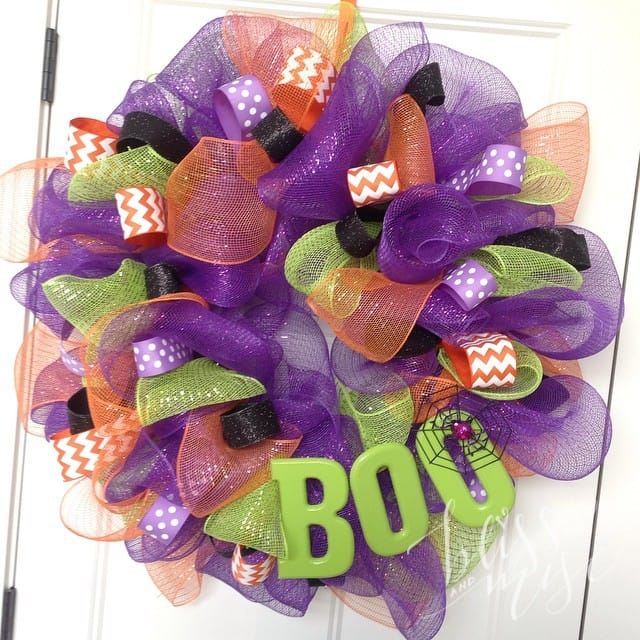
1. Watch precisely ONE YouTube video after googling “How to make a mesh wreath”. Get impatient and fast forward thru any actual instruction as you are clearly a “visual learner”.
2. Go to the craft store. STAY FOCUSED. Buy mesh ribbon in a variety of sizes and colors (save your receipt since you have no idea what you’re doing and figure you’ll return everything you don’t use).
3. Pick out coordinating ribbon. Decide that wired ribbon is too expensive, buy the cheap alternative.
4. Start your wreath with a wire frame and your mesh ribbon. Realize that mesh ribbon is apparently made of velcro and sticks to EVERYTHING (seriously it makes my 18 month old Momma’s boy look like Teflon). Decide the project would be easier done in your swimsuit on the bathroom floor.
5. Randomly bunch the ribbon and attach it to the frame with pipe cleaners. It’s basically impossible to mess up.
6. Begin to cut and attach your ribbon…realize that the cheap ribbon will flop around and hang limply from your wreath. Google “How to stiffen ribbon”. Make a solution of Elmer’s glue and water to dunk your ribbon in and let it dry. Feel like a genius when this actually works.
7. Attach your ribbon to the frame. Hot glue is your friend…no one is going to see the back right?
8. Realize that the charm of mesh wreaths is that they basically look like a craft store threw up on them…add more stuff to it. THEN, add even more stuff….think you’ve gone too far and added too much stuff…then add more. Perfect. You are a craft-goddess.
Optional Step: Realize your wreath is now larger than a small child and you have no place to hang it.


2 Comments
KT
October 6, 2014 at 6:20 pmLOVE your wreath! LOL on your listing of steps that you followed — No one wings it better than you and that’s a crafter with talent for sure!
Mom
October 6, 2014 at 6:40 pmOne of your best articles! Not only can you craft, you write so well!